How To Report Credit
This Help topic describes how to use the credit reporting features and how Collect!'s credit reporting functions work. This requires familiarity with setting up Company Details and Debtors in Collect!, as well as experience using Collect! in your day to day business operations.
The Credit Bureau Reporting module is optional and must be purchased prior to use for reporting credit. There is a fully functional Credit Bureau demonstration module in the Demodb database that ships with Collect!
You can easily send credit reports to the major credit bureaus using the standard Metro 2 (426 character format) file format.
WARNING: Reporting credit is a legal matter. You are responsible for ensuring that the information you are sending is accurate and complete. Do not report credit without being ABSOLUTELY SURE about your legal rights and the legal rights of the person or entity you are reporting.
Reporting Credit
When you set up your credit bureau reporting correctly, Collect! takes care of all the details by automatically scheduling a Metro contact for each debtor that you want to report. After you report, Collect! forwards this contact for the next reporting period. Collect! tracks changes in the debtor's profile for credit bureau purposes and reports the correct codes to the bureau.
Please refer to Credit Report Details for more information. This form is accessed from the Debtor screen. It is where you keep track of the debtor's status for credit reporting purposes.

How To Report Credit
1. To set up credit reporting, you need only to enter your company ID codes as assigned to you by the credit bureaus.
Each reporting bureau requires specific ID codes to identify your company. Please discuss the requirements with your credit reporting agency.
Open the System Administration menu, then choose System Setup and Configuration and Credit Bureau Reporting. In the Credit Bureau Setup form that appears, enter the ID and control codes as required by the bureaus you intend to report to. Press F1 from this form to see details.
2. To assign individual Debtors for credit reporting, select the CBR tab on the Debtor form. This pops up the Credit Report Details form where you can switch ON the switch labeled ' Report to Credit Bureaus' and fill in Credit Bureau reporting options for the Debtor.
Set details such as the type of debt, open the co-signer form if needed, and check out the defaults for your Credit Report Preferences.
3. To assign a batch of Debtors for bureau reporting, select Tools from the top menu bar and then select Batch Processing from the drop-down choices. In the Batch Processing form, select Prepare accounts for credit bureau reporting. Follow the on-screen instructions.
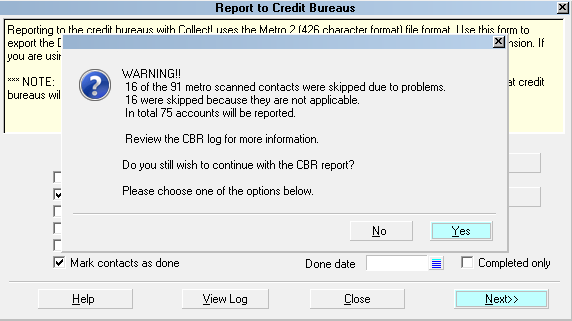
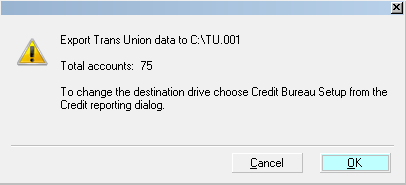
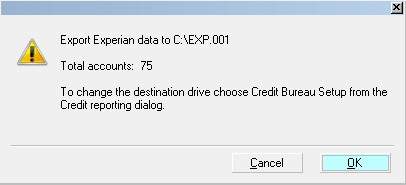
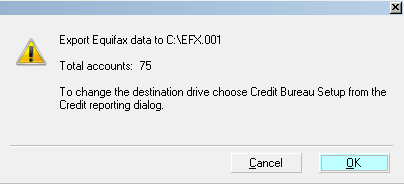
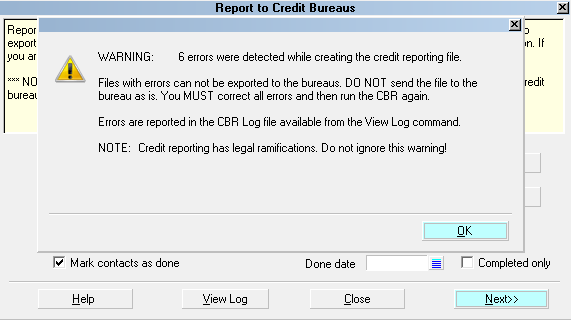
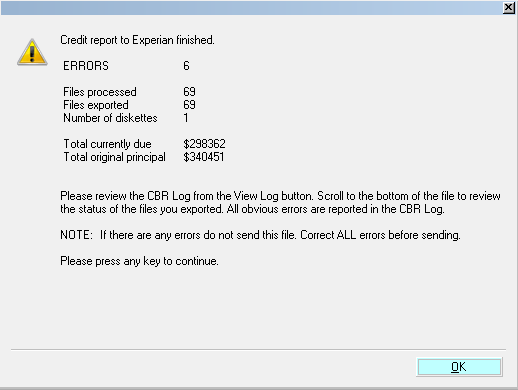
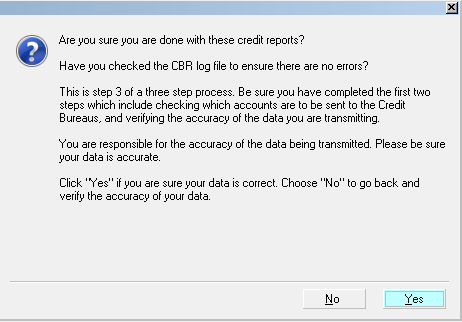
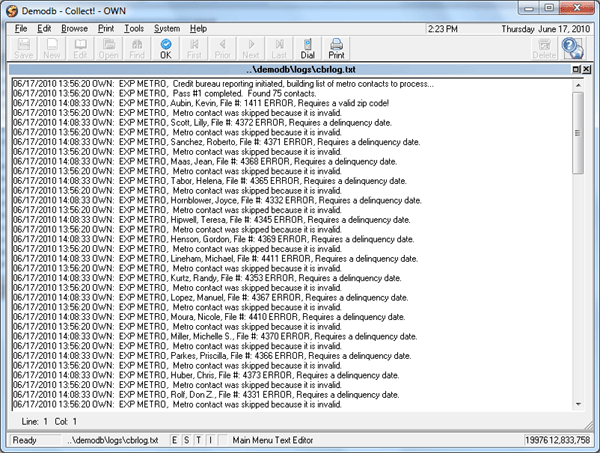
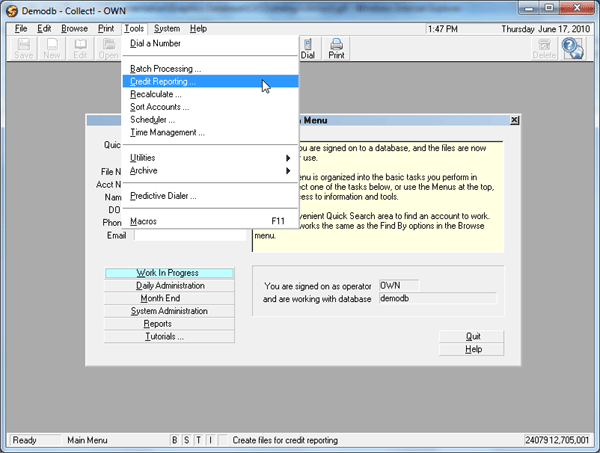
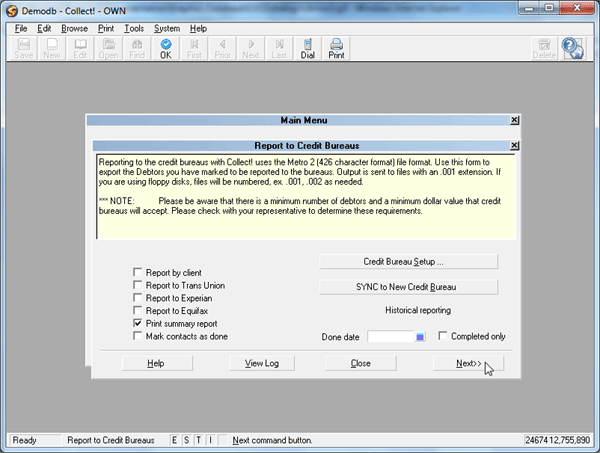
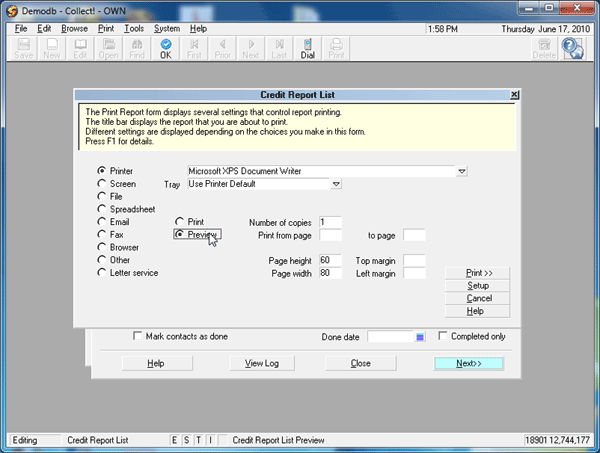
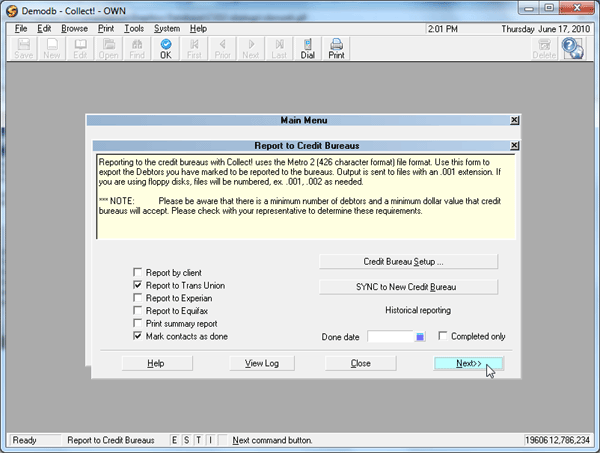
4. To create the Metro 2 file to send to the bureaus, select Tools from the top menu bar and then select Credit Report from the drop-down choices. This will bring up the Report To Credit Bureaus form. Follow the on-screen instructions or Press F1 for help.
How Collect! Credit Reporting Works
The credit reporting functions of Collect! operate mostly behind the scenes, requiring little or no user intervention. However, sending reports to credit bureaus requires attention to detail. It is your responsibility to make sure that the information you send is accurate and complete, and that all the required information is included for the Metro standard that you are using.
When you turn credit reporting on for a Debtor, Collect! schedules a Metro Contact on a specific date. As you set up reporting for debtors, in the Credit Report Details form accessed from the Debtor form, the contacts are saved in the main Contact list.
WARNING: Do not attempt to change the text in the Description field of the Metro Contact, or INACCURATE REPORTING MAY OCCUR. This field is for display only. Collect uses it internally for storing encoded credit reporting information.
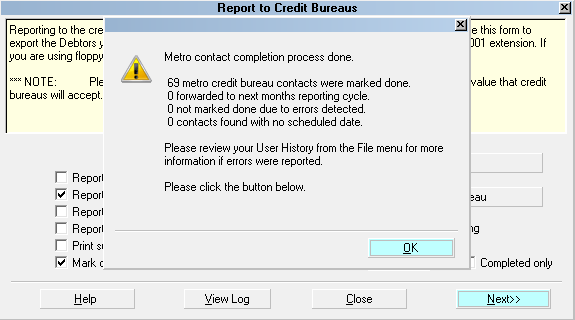
When you create a Metro 2 credit report file, Collect! scans through all Metro contacts scheduled for today and the past. For each contact, Collect! sends the Debtor information to the Metro file, and marks the contact as done, setting its Done Date to today so you know when they were reported.
Contacts are only marked done when you have completed a report with no errors.
The next time you run a credit report, Collect! will not send the ones that have already been marked as done.
When a change occurs that needs to be reported to the bureaus (such as a change in the Debtor's owing, or you closing the account), Collect! schedules a ne contact which contains the updated information. The next time you run a credit report, the new contact is detected and the update is sent. That contact is again marked as done, with its Done Date set appropriately, provided you have completed the report with no errors.
Financial Totals
Collect! manages all normal changes that you make to an account as it is paid and the Debtor's Owing proceeds to zero. All credit reporting details are handled automatically.
If you make changes to an account that are different from the norm, for instance a Judgement or Adjustment or Write Off or Settlement, then you will have to manually adjust your credit report settings at the Debtor level.
Closing Accounts
Collect! manages credit bureau accounts if Paid In Full and will send the appropriate code to the credit bureau and not report anymore. You can also set up Collect! to handle the non-CBR related changes that you may want to make to such an account (such as Debtor Status and Mode.)
If you close an account for other reasons, you will have to manually adjust your credit report settings at the Debtor level.
Canceling Credit Reporting
If you cancel credit reporting before a report has been sent to the bureaus, Collect! simply deletes the scheduled Metro contact. No report on the Debtor will ever be sent.
If a debtor does not have a METRO contact that is marked DONE at the time you set the Status Code in Credit Report Details to Delete Account from Credit Bureau, then Collect! will assume the account has never been reported. Therefore Collect! simply deletes the Metro contact and switches OFF CBR.
If you set the account to cancel reporting after having sent a report to the bureaus, Collect! will schedule a Metro contact to tell the credit bureaus the account has been closed.
Entering Your Company Information
Select Tools from the top menu bar and then select Credit Report from the drop-down choices. When the Report to Credit Bureaus form displays, select the Credit Bureau Setup button the display a form where you can enter your company ID codes. This information is handled slightly differently depending on the format you report in, check your Metro 2 manual for details.
There are a few other choices in this form, including a switch to report by Client Account Number. By default, Collect! sends the Debtor File Number of the account to the credit bureau. You should leave Report client account number switched off unless you are sure you need it. Press F1 for more information on this and the other settings, when you are looking at the Credit Bureau Setup form.
Setting Up The Debtor
WARNING: Reporting credit is a legal matter. You are responsible for ensuring that the information you are sending is accurate and complete. Do not report credit without being ABSOLUTELY SURE about your legal rights and the legal rights of the person or entity you are reporting.
When sending reports to credit bureaus, it is the user's responsibility to make sure that the name and the address fields are in the required format. This information is handled slightly differently depending on the format you report in, check your Metro 2 manual for details.
Pressing F1 from the Debtor and Cosigner forms will bring up help for each field in those forms. This help includes credit bureau reporting details for entering information in each field that pertains to credit reporting. Please read this help carefully, as information sent to credit bureaus must be in an EXACT format.
Debtor Form
The following information is entered in the Debtor form.
File Number
By default, Collect! sends the Debtor File Number of the account to the credit bureau. Once you start reporting to the credit bureaus, the Debtor's File Number must not change while the account is being reported.
You must not have duplicate File Numbers in your database. This is Collect!'s UNIQUE identifier for each account.
Name
The Name of the Debtor entered as ' Last, First Middle Initial'. Please ensure your spelling is correct. If you do not type a comma in the name, Collect! will assume the name is a business name.
Multiple last names must be hyphenated. e. g. Van-Deusen, Jack.
Only enter one Debtor's Name in this field. If you have a Cosigner, use the Cosigner form.
When reporting Commercial accounts, Collect! can detect a business name as long as there is no comma in the Name. If there are commas in the business name, please ensure that you switch ON "Business/Commercial" in the ECOA designation when setting up the account for reporting.
Generation
Use this field for generation, not the Name field. (Jr., Sr., II, III, etc.)
Address
For accurate reporting of addresses, checkout the handbook called Postal Addressing Standards at your local US Post Office. Use standard postal abbreviations for type of street.
For example, 'Pkwy' for Parkway or 'St' for Street
There are two acceptable address formats. Please note that the commas between City and State are required where shown below, and Address Line 1 is interpreted as a contact name only if there are no numbers in the field.
- Format 1:
- Address = street address
- Addr1 = blank
- City = city
- State = state
- Zip = zip
- Country = country code
- Format 2:
- Address = street address
- Addr1 = suite or apartment number
- City = city
- State = state
- Zip = zip
- Country = country code
Do not include the # symbol in the apartment number. The Credit Bureau rejects addresses with the # sign. If no zip code is found, the address lines are ignored and not reported.
Addr 1
Do not use words like "Suite", "Apt.", etc. or the '#' symbol, just enter the Number of the suite or apartment.
City
Truncate the rightmost portion of this field to 20 characters, or use the standard 13-character U.S. Postal Service city abbreviations.
State
Enter the State or Province code in this field. Us the correct Postal Service codes.
For Example: WA for Washington
ZIP Codes
The zip code may be either 5 or 9 digits for U.S. zip codes, or 6 digits for Canadian postal codes.
For example: 12345-6789 or 123456789 for U.S. and X2Y 3Z4 or X2Y3Z4 for Canada.
Country
Enter the standard two-character country abbreviation.
SSN
Enter a valid SSN. If SSN is not known, Please check with your Client/Account provider for the required information.
For example: 123-45-6789 or 123-456-789 or 123456789
DOB
A valid Date of Birth must be entered. If DOB is not known, Please check with your Client/Account provider for the required information.
Please refer to F1 help from the Debtor form for additional information regarding fields for credit bureau reporting.
Client Form
If you are reporting in METRO 2 format, you must enter a valid creditor classification for each Client whose debtors you are reporting. Enter this information in the Client form's Type field. This field contains a pick list of choices that represents the standard credit bureau list of valid creditor classifications. If the choice you want is not contained in the list, please confirm with your credit bureau that it is a valid classification. If so, you can add it to the list. See How To Use Pick Lists.
Please inform Comtech Systems if you discover a valid classification that is not in the default list.
Client Settings Form
Three additional settings are necessary to set in the Client Settings form. On the left side of the Client Settings form, three boxes to be checked.
1. Report accounts to bureaus: When this is checked, Collect! knows that the Client is set to report credit.
2. Send client detail to bureaus: When this is checked, the client's details will be sent to the Bureau.
3. Delinquent 31 days prior to list: is no longer a valid option. If Delinquent Date is not known, Please check with your Client/Account provider for the required information.
WARNING: You must provide a delinquency date for all accounts reported to the Credit Bureau. The delinquency date appears on the Debtor form and is defined as the date of the first delinquency that led to the derogatory status being reported.
It is always better to put in the exact Delinquency Date, if it is known, whenever you set up an account for reporting to credit bureaus.
Credit Report Preferences Form
The following information is entered in the Credit Report Preferences form. The options are used as default values when you report Debtor credit.
The list of default account types provided by Collect! covers normal collection and credit management. Refer to your Metro format manual for details.
Press F1 from the Credit Report Preferences form for more information about the following options.
WARNING: It is the User's responsibility to make sure that any values that the User creates abide to the standards set by the Metro 2 Format.
If you are having trouble deciding what default values should be set, contact your local credit bureau representative.
WARNING: Reporting credit is a legal matter. You are responsible for ensuring that the information you are sending is accurate and complete. Do not report credit without being ABSOLUTELY SURE about your legal rights and the legal rights of the person or entity you are reporting.
Industry
This field contains the industry type that classifies the reporting agency. The list of default account types provided by Collect! covers normal collection and credit management. Please refer to your Metro 2 Manual for help in choosing from the pick list.
Account Type
This field contains the account type code that identifies the account classification. The list of default account types provided by Collect! covers normal collection and credit management. Please refer to your Metro 2 Manual for help in choosing from the pick list.
Status Code
This field contains the status code that properly identifies the current condition of the account. The list of default status codes provided by Collect! covers normal collection and credit management. Please refer to your Metro 2 Manual for help in choosing from the pick list.
Portfolio Type
This field contains the type of the debt. The pick list offers choices for common credit and loan types. Please refer to your Metro 2 Manual for help in choosing from the pick list.
Comments
This field is used in conjunction with the Account Status to further define the account. Special comment codes, when found, will however take precedence over the value in Account Status.
The list of default choices provided by Collect! covers normal collection and credit management. Please refer to your Metro 2 Manual for help in choosing from the pick list.
Association
This is used to designate an account in compliance with the ECOA. This setting can be changed for an individual Debtor through the Credit Report Details form accessed from the Debtor form.
The list of default choices provided by Collect! covers normal collection and credit management. Please refer to your Metro 2 Manual for help in choosing from the pick list.
Condition Code
This field allows for reporting of a condition that is required for legal compliance; e.g., according to the Fair Credit Reporting Act (FCRA) Please refer to your Metro 2 Manual for help in choosing from the pick list.
Country Code
This is the country that the Debtor lives in.
The list of default country codes provided by Collect! is only a few of the most used country codes. Please refer to your Metro 2 Manual for help in choosing from the pick list.
Default Info Ind
This field provides for entering a value indicating a bankruptcy condition that applies to the Debtor cosigner. Please refer to your Metro 2 Manual for help in choosing from the pick list.
Delay Before 1St Report
Switch this On to Delay before the first Credit Report. Enter the number of days to delay in the Delay Days field.
This switch is used in conjunction with the Credit Report Details form accessed from the Debtor form. When you switch ON "Report to credit bureau" in the Credit Report Details form, the "Start reporting" date will be calculated according the defaults you set here. You can override these by choosing a new "Start reporting" date in the Credit Report Details form for a particular Debtor.
Delay Days
Enter the number of days that you wish to delay before reporting a new Debtor or an existing Debtor that you choose to report to credit bureaus. The number you enter here will be calculated into the "Start reporting" date in the Credit Report Details form accessed from the Debtor form.
Cosigner
This field is used to determine if the Debtor has a cosigner to be reported on. ECOA choices and details are filled in on the Debtor Cosigner form. Select the COSIGNERS tab in the Debtor form to access Cosigner information for the Debtor. Press F1 when the Debtor Cosigner form is displayed. The Help topic contains valuable information about credit bureau reporting formats for each field.
ECOA options and choices are determined by the Metro format you choose as your credit bureau reporting standard.
Pressing F1 from the Debtor and Cosigner forms will bring up help for each field in those forms. This help includes credit bureau reporting details for entering information in each field that pertains to credit reporting. Please read this help carefully, as information sent to credit bureaus must be in an EXACT format.
K1 Segment Original Creditor Client Detail
You must be sure put a check in the box labeled Send client detail to bureaus in the Client Settings form to send the K1 segment.
|
 This topic can only be used after the Credit Bureau Setup is complete. Please refer to How To Setup Credit Bureau Reporting if you are not sure you are ready to run a credit bureau report.
 WARNING: Reporting Credit is a legal matter. You are responsible for ensuring that the information you
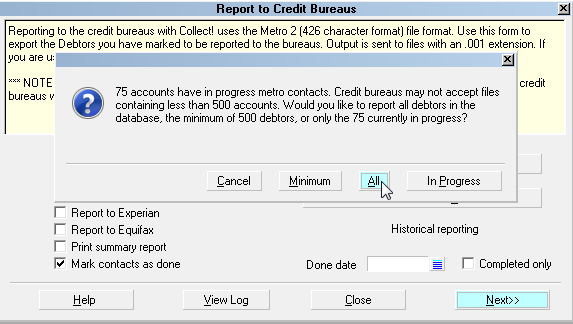
 Please refer to the section below entitled "Reactivate Metros" for information about the choices that are presented to you.