Printing A Summary Report
 This procedure prints a summary report for your own information. This is not sent to the bureaus.
Although not absolutely necessary, a summary report is useful to review the output to be sure the desired accounts are being reported.
This creates a report that you can print and keep for your records.
1. At the Collect! Main Menu, select Tools from the top menu bar and then select Credit Reporting from the drop-down choices.
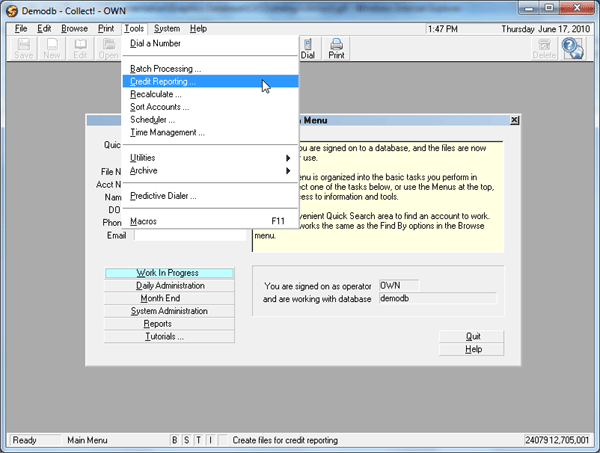
Tools Menu - Credit Reporting
This will display the Report To Credit Bureaus form.
2. You will notice several check boxes on the left side of the form. We want to know how many
In Progress Metro contacts we have for Collect! to process. So, place a check mark in the box labeled Print summary report.
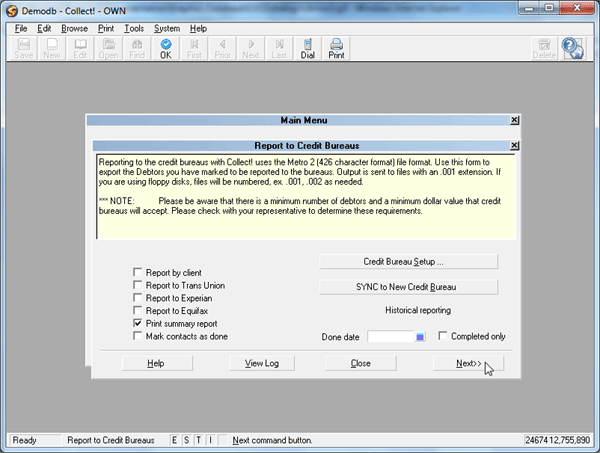
Report To Credit Bureaus - Print Summary Report
Select the NEXT button.
For Printer Destination, we will just select PREVIEW to see the total number of In Progress Metro contacts.
Most likely you will not need to print this report and it may be many pages long!
We use it primarily to get an idea of the number of accounts we are processing in this credit report.
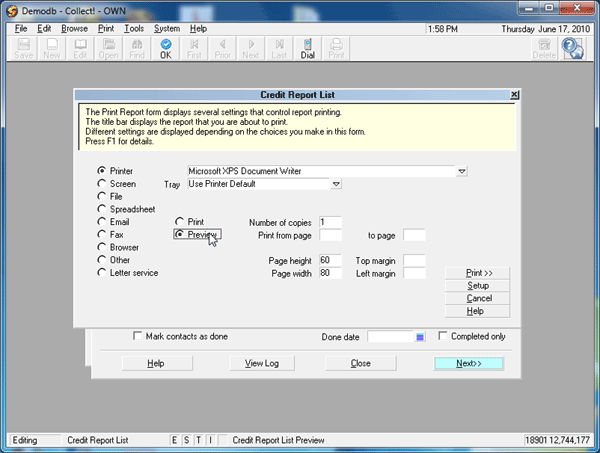
Credit Report List Printing Options
Select PRINT and the report will be displayed. Scroll to the bottom and note the number of Accounts Listed.
You can use this to verify the results later on. Then close the Print Preview window and return to the Report to Credit Bureaus dialog.
Choosing The Credit Bureau To Report To
You should be looking at the Report To Credit Bureaus form. Notice that are three names of Credit Bureaus on the left side of the form.
1. Please place a check mark in the box next to the Credit Bureau you are reporting to. Put a check mark for at least one credit bureau
and uncheck the 'Print Summary Report' check box so that it will not try to print again.
You can report to one Bureau only or all of them. If you select more than one Bureau,
Collect! will produce three separate files, one for each bureau, one after the other.
If you chose your C drive in the Credit Bureau Setup, these files will be located in the root of your CV11 folder.
The prescan routine used by Collect! will be done only once even if you are reporting to more than one bureau.
2. Place a check mark in the box labeled 'Mark contacts as done'.
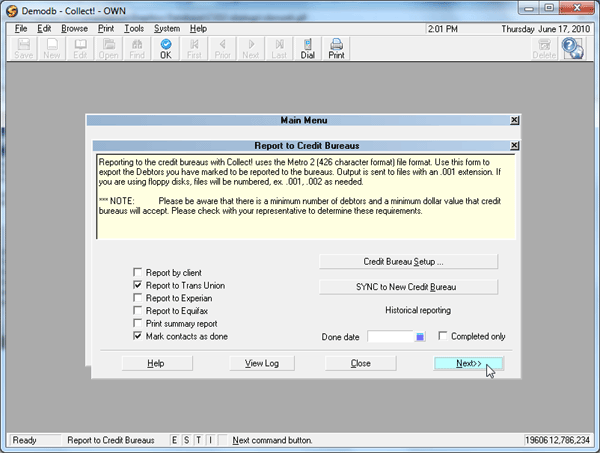
Report To Credit Bureaus Settings
3. When you are ready, select the NEXT button to proceed.
Collect! will quickly count your active Metro contacts and present you with the results.
If you have fewer than 500 accounts actively being reported to bureaus, you will be prompted for further action.
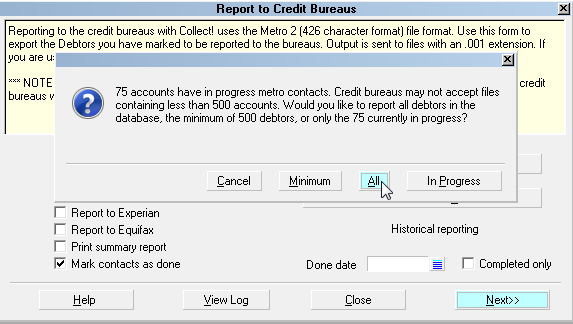
Report Minimum 500 Required Accounts
 Please refer to the section below entitled "Reactivate Metros" for information about the choices that are presented to you.
If you have more than 500 accounts actively being reported, Collect! compiles the Metros and prepares to produce your report.
With fewer than 500 accounts, this process happens after you select ALL or IN PROGRESS when the prompt is displayed.
4. After Collect! processes the Metro contacts, a summary dialog displays. It may have warnings about accounts that Collect! cannot process for the credit report.
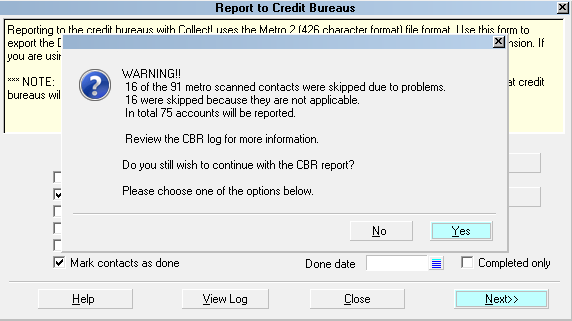
Credit Report Warning
Collect! counts all the Metros. Then it eliminates the future dated ones as "not applicable."
This is for your information only and requires no action on your part.
Also, Collect! warns you of accounts that were skipped "due to problems."
These instances are recorded in the CBR Log and should be reviewed so that you can correct them.
You have two options. You can select YES to continue with your report and leave the problem accounts out of this report, or you can select NO,
review the CBR Log, correct any problems and run your report later.
5. Select YES to continue with your report. Collect! will display the bureau file it is creating, the name and location where the file may be found.
If you are reporting to more than one bureau, this prompt will display for each bureau as shown below.
The screen shot below shows that Collect! will create a credit report file for Trans Union in C:\TU.001.
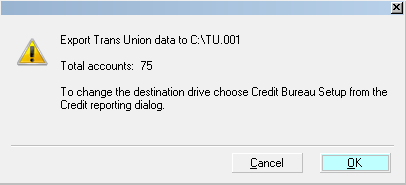
Export Data for Trans Union to C:\TU.001
The screen shot below shows that Collect! will create a credit report file for Experian in C:\EXP.001.
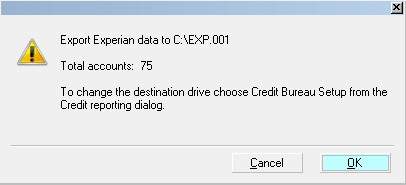
Export Data for Experian to C:\EXP.001
The screen shot below shows that Collect! will create a credit report file for Equifax in C:\EFX.001.
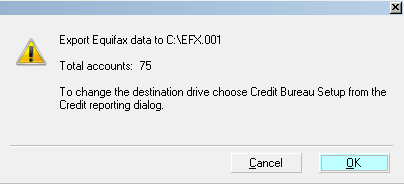
Export Data for Equifax to C:\EFX.001
If you create your files on Drive C, you may get a file permission error in some of the latest operating systems.
It is recommended that you map a drive to use for your credit bureau reporting files.
6. If there are errors in any of the data for the accounts you are reporting, you will see an error message.
Collect! will display a summary of errors. These errors should be corrected so that all your accounts can be included in the credit report file.
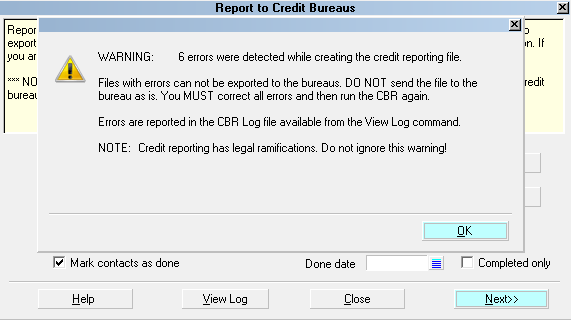
CBR Reporting Errors
7. The next form will tell you what was processed. Please note how many files were processed and exported.
You can compare this with the results obtained earlier when you printed the Summary Report.
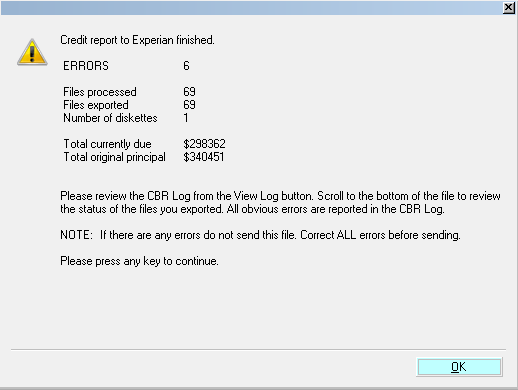
Credit Report Results
The screen shot shows errors. Please note that the errors must be corrected or the accounts in error will not be included in the credit bureau file.
You need to correct all errors and run the credit bureau report again until it reports "No Errors."
Accounts that cannot be reported due to errors will be listed in the CBR Log. Collect! creates the file for you but leaves these accounts out of it.
8. Select OK. You will now be asked if you are done with the credit reports.
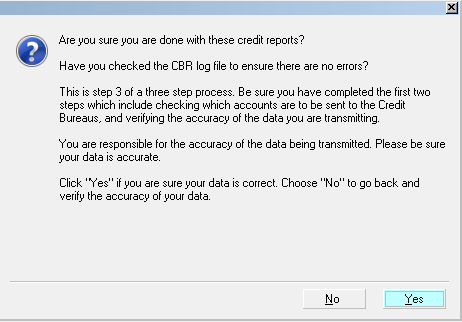
Select NO If There Are Errors To Correct
You must select NO if you have errors. Then view the CBR Log to see the details so that you can correct the errors.
View CBR Log
After this Collect! displays the CBR Log for you. If there are any errors, they will be reported in this log.
You can examine it for details and file numbers if you have errors to correct. One common error is no Delinquency Date.
The viewed log message below shows examples of errors that you may see. Please go back to these debtors and add the
necessary information and run your report again. You may even have to run a report a few times to correct all errors.
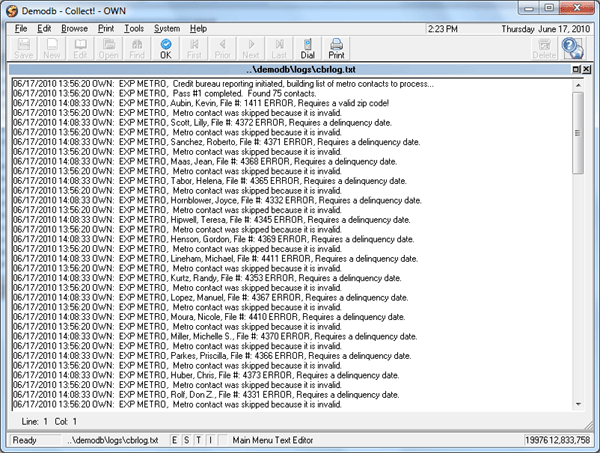
Errors Reported In CBR Log
If you don't usually clear the contents of this log when asked to "Clear Log" after viewing it, you may need to scroll to the bottom
the log to see the most recent session entries.
After viewing the log of your results, if there are no reported errors, you can now close the log.
You will be prompted to clear the log. Choose YES or NO.
After you have corrected any errors, run your report again. When you have no errors, you can say YES when asked if you are done with the credit reports.
Select YES to Mark Contacts Done
Marking The Contacts Done
This is a very important step. When you are finished reporting each month, you MUST mark the Metro contacts as done
BUT only if you are really finished with the report!
When you run your report and it shows no errors, you are ready to send your file or files to the bureaus.
It is very important that contacts are marked done as the last step.
It is also important that they are not marked done if you still have errors to correct and you want to include all the accounts in the final file that you create.
Select YES to Mark Contacts Done
If you have errors to correct, select NO. Correct your errors and run your report again.
Select YES only if you have no errors to correct and you want to mark the
Metro contacts as done and send the file or files that Collect! just finished creating.
If there are reported errors, the Metro contacts for these debtors will not be marked done.
When you select YES, Collect! marks all the Metro contacts as Done EXCEPT any outstanding errors.
Metro contacts on accounts that could not be reported due to errors are left In Progress.
Collect! will automatically take care of creating next month's Metro contacts for your accounts, if appropriate.
A final summary window will display the number of Metro contacts marked done and the number forwarded.
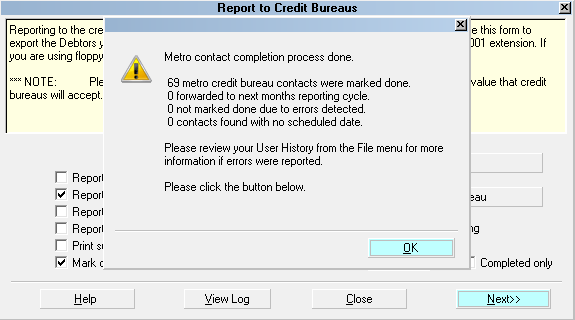
Summary of Metro Contacts Processed
Select OK to close the window.
CBR Test File
You may now send your first file to the credit bureau AS A TEST. If they are satisfied and accept it,
you may resubmit it as an actual report.
Collect! creates the files but it does not submit them. You must do that yourselves in whatever way
you have agreed upon with your credit bureau representative.
Reactivate Metros
Some credit bureaus will no longer process a file with fewer than 500 accounts. Collect!'s Credit Bureau Reporting function handles
this by giving you options to reactivate Metro contacts. You may use these options to report as many of your CBR accounts as necessary
to fulfill the bureau requirements.
If you have fewer than 500 accounts to report, you are presented with the option of reporting all CBR accounts in the database,
or reactivating as many accounts as needed to report 500 accounts.
Report Minimum 500 Required Accounts
Select Report In Progress to report only the accounts that have active Metro contacts.
Please be aware that the credit bureau may reject your file if they require a 500 account minimum report.
Select Report Minimum to reactivate the necessary number of Metro contacts to report 500 accounts.
This process may take a while as Collect! browses your list of debtors to find accounts with CBR switched ON.
Select Report All to reactivate all your Metro contacts and report all accounts with CBR switched ON.
This process may take a while as Collect! browses your list of debtors to find accounts with CBR switched ON.
After Collect! determines which debtors have CBR switched ON, the required number will be reactivated.
After the Reactivate Metros function has completed, the credit report file is created.
Historical Reporting
There are times when you may want to report to credit bureaus in a fashion that is not covered by the normal scheduled events.
For instance, you may need to rerun a report that was already completed.
The historical reporting section of the Report To Credit Bureaus is designed to handle these anomalous reporting procedures.
You can specify a date and/or choose to run your report on completed contacts.
DONE DATE
Choose a date to run a report on Metro contacts that were marked done on this particular date.
COMPLETED ONLY
Switch this ON to include only completed Metro contacts in this credit bureau report.
Historical reports are run following the same procedures outlined above, for regular credit reporting.